
Does your phone only charge if you bend the cable at just the right angle? Relax — youre not alone, and theres plenty you can try before giving up. In this guide we explain how to diagnose the fault and what options you have to bring your charger back to life, whether you use Android or iPhone, and whether you connect via USB-C or Lightning. Well also go from simple to advanced, like when debugging any circuit: first we isolate the failure, then we clean, and if necessary we move on to more advanced repairs. Ready to get those precious watts back?
Diagnose the problem step by step
Before you start fixing anything, its worth identifying which part is failing: the wall outlet, the power adapter, the cable, or the phones charging port. Start with the basics and check whether the cable shows visible damage, such as cuts, stripped insulation, or areas where moving it interrupts charging; if so, theres likely a broken conductor inside.
Make sure youre using the correct charger for your device: sometimes we plug in a cable that “looks like” the right one but isnt compatible, and it will never charge. Then check the power point: the outlet may be controlled by a wall switch. Plug in a lamp, turn it on and toggle the switch; if the light turns off and on, you know that outlet is controlled by that switch. If youre using a power strip, confirm its switch is on. And if you suspect the circuit, check the breaker panel in case a circuit breaker has tripped; reset it if appropriate and try another outlet in case the first one has failed.
Now isolate components: try the same cable with another wall adapter you know works, or plug your cable into an outlet with an integrated USB port. If the phone charges with another cable but not with yours, there you go: the problem is the original cable. Some adapters, like those for Mac or iPhone, include LED indicators; if they light up, theyre receiving power and you can focus on the cable or the phone.
Do you have a multimeter? It will help confirm things. Measure the outlets voltage to check its supplying power. Then check the cable for continuity (): if you touch the same pin at both ends and get 0 ohms, that section is fine; if it reads infinity, the cable is broken. Finally, place the probes on the contacts of the USB port of the adapter plugged into the wall; if you dont get a reading, that adapter needs replacing.
Clean, restart and try combinations
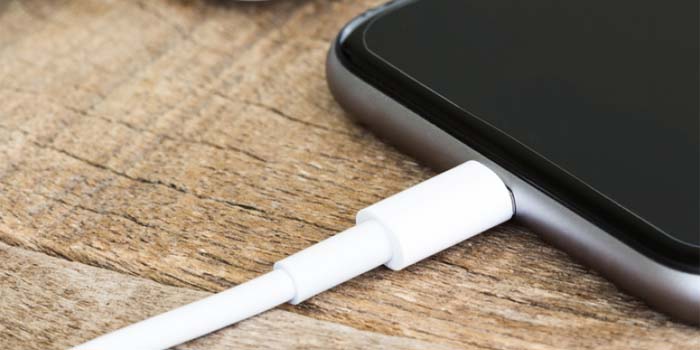
A common and sneaky cause is accumulated dirt. On both Android and iPhone, a speck of lint in the charging port can block the contact. Disconnect everything and clean the port with compressed air; if residues persist, use a wooden toothpick and a little isopropyl alcohol gently. Take the opportunity to clean the plug tip of the cable as well.
Dont forget the other end: the USB port of the adapter or power strip can fill with dust. Clean it with a cotton swab or a non-metallic tool and, above all, do it with the charger unplugged to avoid unpleasant surprises.
Another effective tactic is to “reset” the connection. Disconnect the cable from the phone and the adapter, wait a few seconds and reassemble: cable to the phone first, then cable to the adapter, and finally the adapter to the outlet. If you were charging from a computer, restart it and try again, since a simple reboot can resolve power negotiation errors.
To better isolate the source, change the combination: if you were charging from the laptops USB and its slow or not charging, use a wall adapter. Also try another wall adapter and another cable when you can. With these permutations youll locate whether the fault is in the power source, the adapter, or the cable itself. This methodical approach, very “Raspberry Pi vibes”, saves time and gives you a reliable diagnosis.

Repairs: from tape to the soldering iron
If youve determined the cable is damaged, there are temporary fixes and more serious ones. For a quick solution, electrical tape can partially cover stripped insulation and stabilize the area; its not permanent, but it can get you out of a pinch. Even better is to use a 3:1 heat-shrink tube and a precise heat gun: cut a section slightly longer than the crack or opening, slide it over the area and apply heat while rotating the cable so it shrinks evenly. Let it cool for a few minutes before using.
When the damage is close to the cable head (just before the connector), you may need to open and repair the internal joint. Youll need cutting tools, a soldering iron, solder and a glue gun or small pieces of heat-shrink. Make a careful cut around the casing without severing the wires; gently separate the assembly and locate the conductors. Apple cables commonly have four colors: red, white, green and black; the power lines are red and black, while white and green carry data. In many Android cables the color code can vary, so if youre not sure which to join, its better to stop and buy a new one.
Tin and solder only the connections necessary for power, keeping your fingers away from the heat (pliers with insulated handles are great). Then insulate each wire so they dont touch inside the cable head, either with hot glue or pieces of heat-shrink. Close the opening with the same heat-shrink tube, electrical tape, or a combination of both for reinforcement. If after the repair the cable is still dead, its time to replace it with a new one; sometimes, no matter how much care you put into it, its not worth it compared to a quality cable that saves you headaches.
In short, start with the simple stuff, do cross-checks to isolate the fault, clean and restart, and only proceed with repairs if youre comfortable with the tools. With this workflow, youre most likely to see the charging icon again in no time.
.
